Homepage Style Customization Options
A number of option settings under this section will refer to “hero”. This is the ID/name for the banner tool/function.
- From the Website View, click on Customize from the WordPress Menu at the top

- Click on Homepage Style
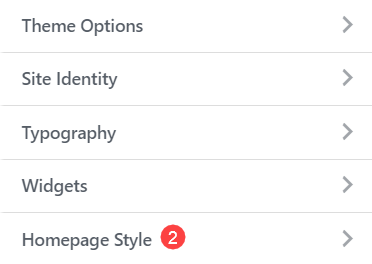
- Select the following sections to edit:
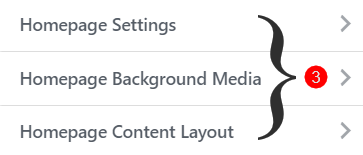
- Homepage Settings – Banner text padding, text animation type, text and slide animation speed
- Homepage Background – Banner images/videos, background overlay color
- Homepage Content Layout – Banner text, banner button links
- Click Publish when you are done editing
- Click X in the top left to exit the customization window

Homepage Style Sections in detail:
Click on the headings below for detailed explanations of the settings under each section.
Hide This Section
Select this option if you would like to remove the homepage banner.
Section ID
“Hero” is what the banner tool/function is called. Do not change this ID. It will affect how this style/theme functions.
Make hero section full screen
Select this option to enlarge the banner to full screen on devices.
Disable Preload Icon
Select this option if you would like to remove the preloading icon that appears while images for the banner are still loading. (not recommended)
Padding Top & Bottom
These values determine the space between the top and bottom of the banner from the heading text/content within it. They will also affect the height of the banner. The values are calculated as percentages.
Text Animation
Select a text transition animation from the drop-down menu for the banner heading.
Text Animation Speed
The amount of time between banner heading text/phrases
Slider Animation Speed
The speed at which the image will fade in.
Slider Duration Speed
The amount of time between banner images.
Background Images
You can add multiple images to the banner area. They will appear in rotation.
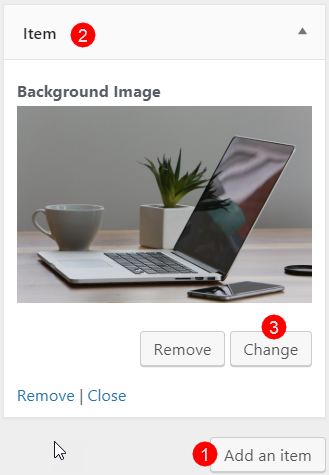
To add an image (5MB file size limit):
- Click Add an item
- Click Item (the most recently added one will appear at the bottom)
- Click Change
- Select an image from your computer
Enable parallax effect – Select this option to disable banner image rotation. The image will stay fixed on the first image item.
Background Video .MP4, .WEBM, .OGV (5MB file size limit)
You can replace the banner background with a video. Only one video can be selected. The video will loop continuously. This will disable images from the top section from appearing.
Background Overlay Color
Select a colour to overlay your banner background images or video. You can also adjust the opacity of the overlay.
There are two banner layouts that you can choose from:
- Layout 1 – Content is center aligned with rotating heading/phrases
- Layout 2 – Text content is left aligned with the option to insert an image displayed in the right. Content is static.
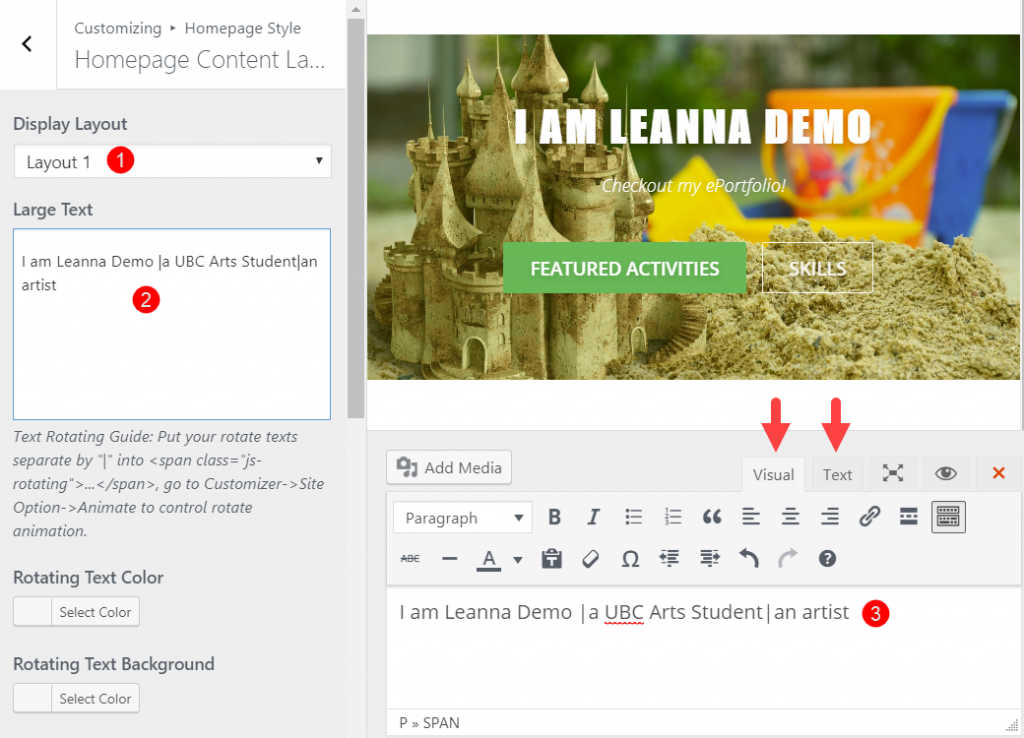
Layout 1
- From the Display Layout drop-down menu, select Layout 1
- Click into the Large Text field
- Modify the text in the text editor field that appears in the main content area. This is the banner heading.
- To add text in for rotation, insert a divider between phrases. (You can work in the Visual or Text(HTML) view of the editor)
- Example (Visual View): I am Leanna Demo|a UBC Arts Student|an artist
- Example (Text View): I am<span class=”js-rotating”>Leanna Demo |a UBC Arts Student|an artist</span>
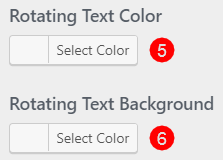
- Select a Rotating Text Color (default is white)
- Select a Rotating Text Background (default is transparent)
- Click into the Small Text field
- Modify the text in the text editor field that appears in the main content area. This is the text that appears underneath the banner heading.
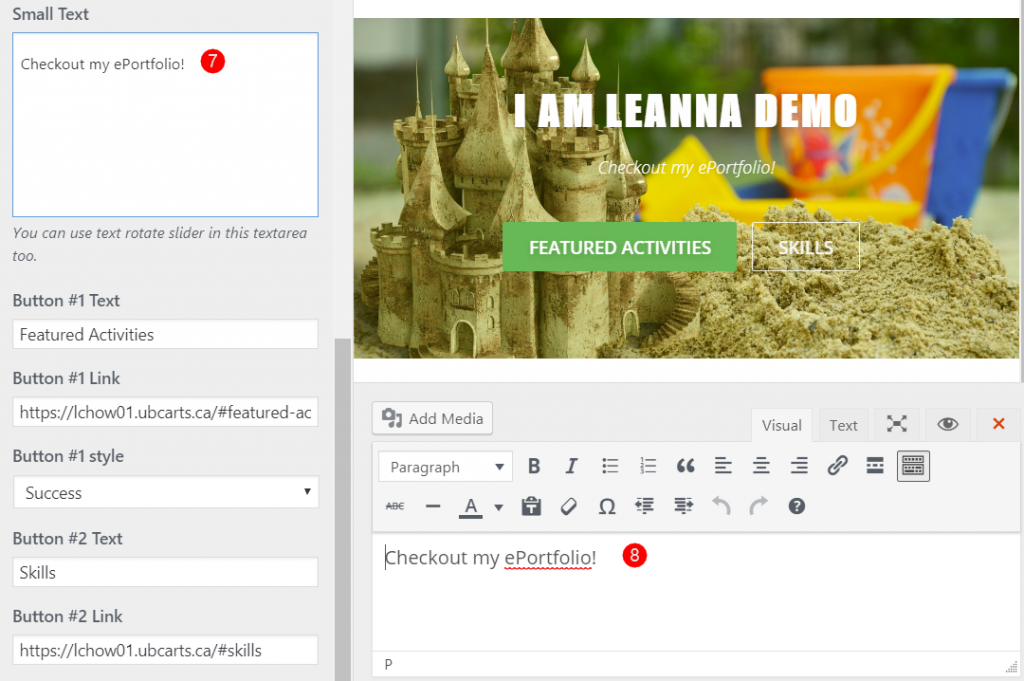
- Edit each attribute of the two button links:
- Button Text – Text that appears on the button.
- Button Link – Enter a web page URL address. (remember to include https://)
- Button Style – Select a style. Each style is a different colour

Layout 2
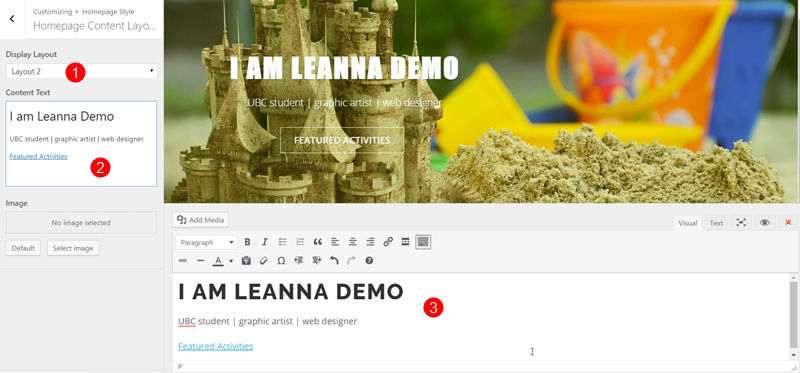
- From the Display Layout drop-down menu, select Layout 2
- Click into the Content Text field
- Modify the text in the text editor field that appears in the main content area. (Click on the Visual tab in the upper right of the text editor to work in the visual view)
- To modify the button text and link:
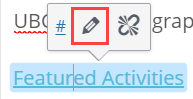
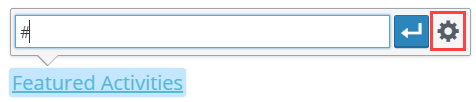
- Click on the link
- Click on the Pencil Icon
- Click on the Gear Icon
- Enter a URL or select a page from your site listed below
- Enter a Link Text
- Check the box beside Open link in a new tab (optional, recommended when linking to an external URL)
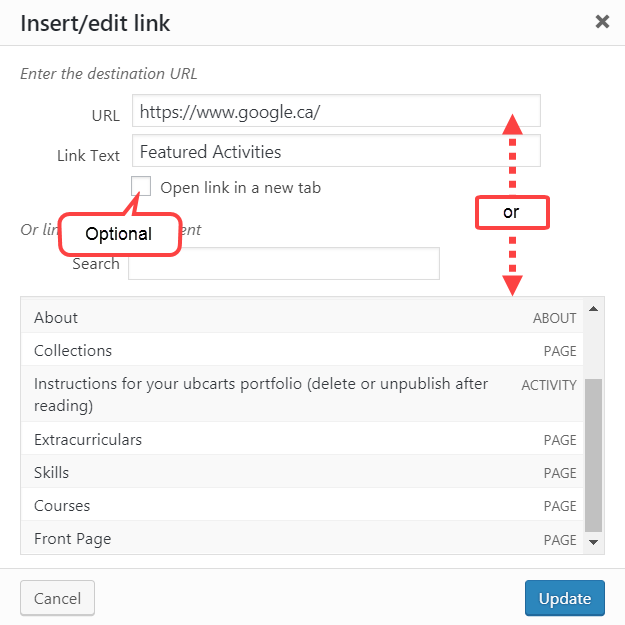
- Click Update
- Select an Image (Optional. By default, an example image is displayed in the right-hand side of the banner. Click Clear to remove it.)