Including Multimedia
Depending on the type of Activity, an image or video might help to provide more context to the learning Activity. For example, if the Activity is a written essay without any accompanying illustrations or images, you might consider using an image of the subject discussed, a book cover, video of a related scholar, etc. In some cases, the Activity itself might be an image or video that was produced for a creative project assigned in a course.
Include: Copyright info, citing sources, using personal photos, logos…
Choose your Activity media based on the type of project or experience represented in the learning Activity. Depending on the discipline, course or extracurricular the learning activity emerged from, example categories of projects might be Writing, Visual Art, Performance, Research, Apprenticeship, Volunteering, Film & Video, etc. Within this range of categories of projects exist specific genres, approaches and formats that these projects might be defined as.
| Types of Activities | Genre or Medium | Media |
|---|---|---|
| Writing | Essay, short Story, Graphic Novel | Body text or PDF |
| Visual Art | Drawing, Painting, Installation | JPG Photos/Scan |
| Performance | Drama Play, Spoken Word | video or Audio |
| Research | Interview, Literary Analysis | Text/Video excerpt |
| Volunteering | Non-Profit Organization, MAS | JPG Photos |
| Film & Video | Animation, Documentatry | Video |
| Digital Design | Video Game, Website | Screenshots, URL |
- In the text editor field, place your cursor where you would like to insert the file
- Click Add Media
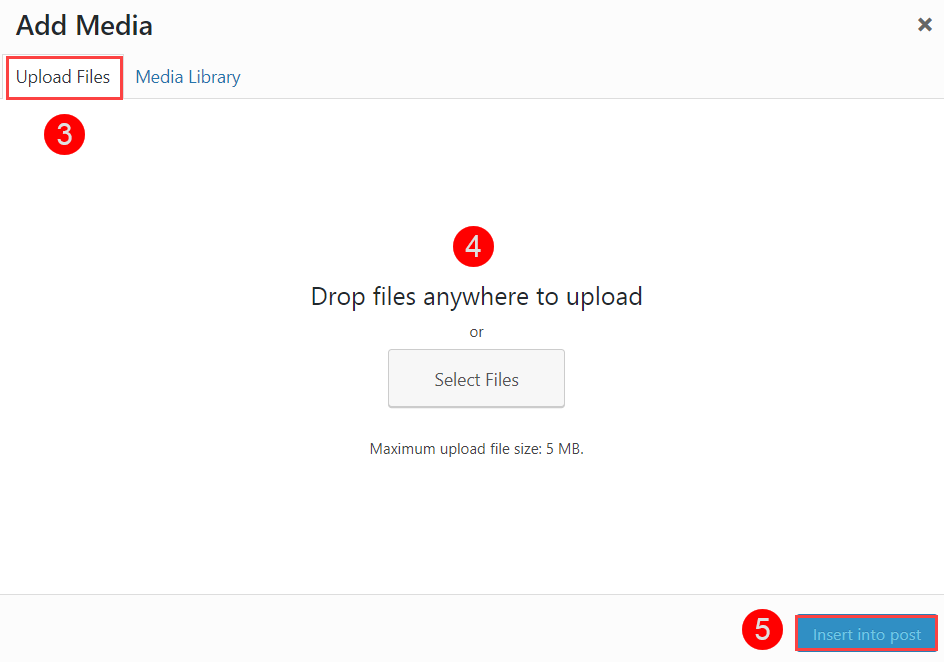
- Select the Upload Files tab (or the Media library tab to insert a previously uploaded file)
- Click Select Files OR drag and drop the file from your computer into the indicated uploading space
- Click Insert into post
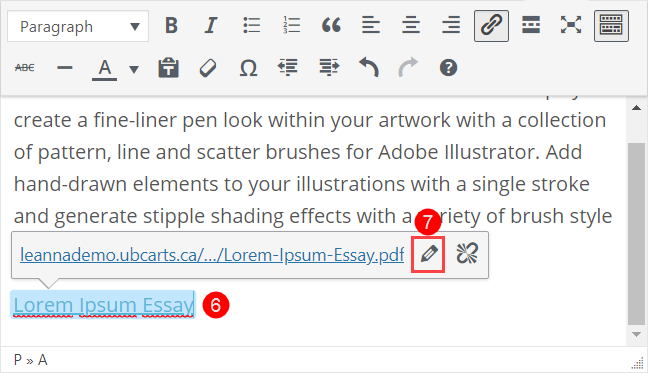
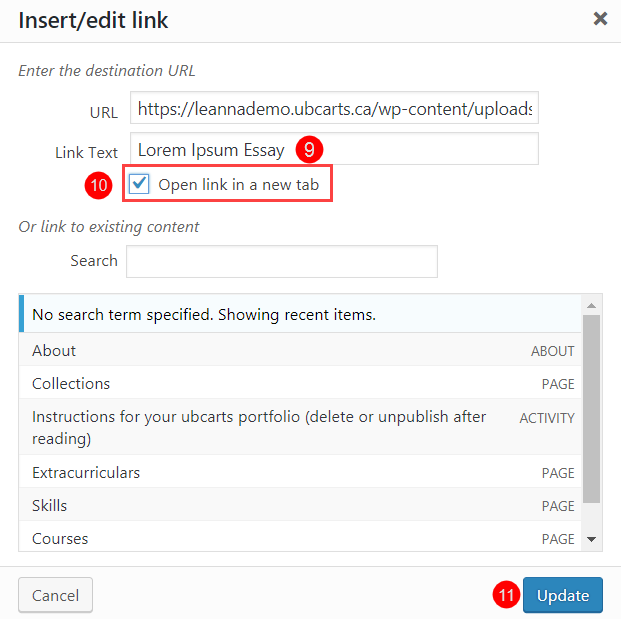
- Click on the file link that you’ve inserted
- Click on the Pencil Icon
- Click on the Gear Icon

- Edit the Link Text
- Check the box beside Open link in a new tab (this is optional, recommended for PDF files)
- Click Update
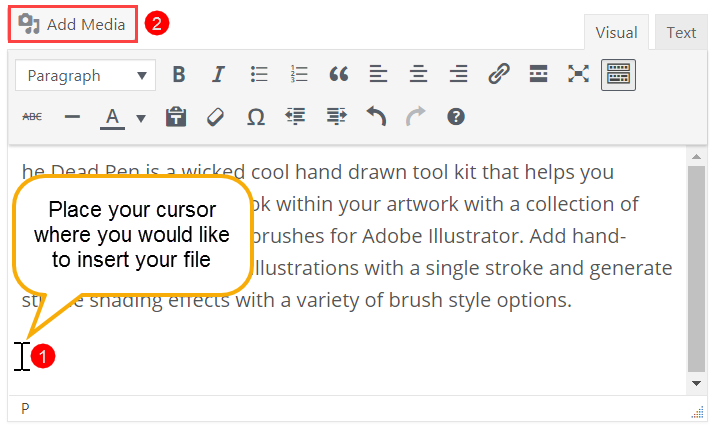
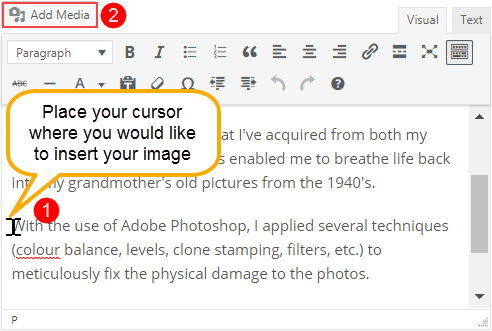
- In the text editor field, place your cursor where you would to insert the image
- Click Add Media
- Select the Upload Files tab (or the Media Library tab to insert a previously uploaded file)
- Click Select Files OR drag and drop the file from your computer into the indicated uploading space

- In the Attachment Details panel to the right, you can edit the following optional settings:
- Title
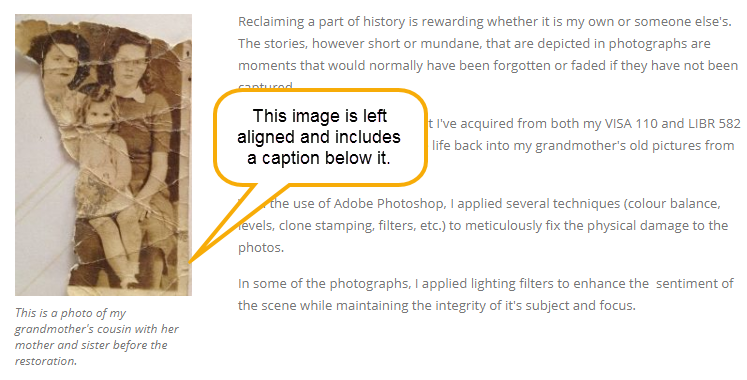
- Caption – accompanying text that appears below the image
- Alt Text – text that appears in replacement of the image if it does not load properly or spoken if a viewer is using a screen reader
- Alignment – align your image to content (example: if “left” is selected, content will wrap to the right of the image)
- Link To – by default the image is static (None), however you can link it to a URL, media or attachment page (both these options will link to the full size version of the image)
- Size
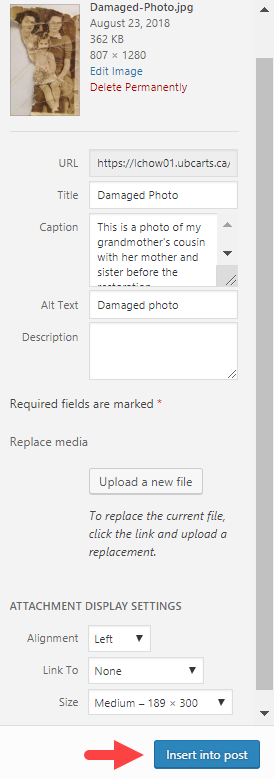
- Click Insert into post
Editing an Inserted Image
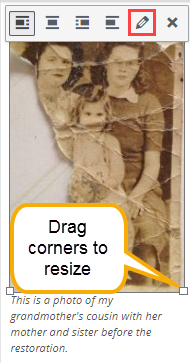
- Click on the image
- A bounding box will appear around the image. You can drag the corners to manually resize the image.
- You will also see a set of quick alignment options and a pencil icon to open the full options window
This is because videos tend to be larger in file size. The size limit is 5MB per file upload.
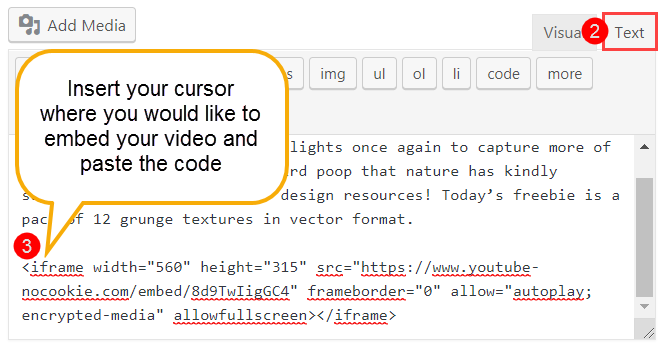
- Locate and copy the embed code for your video from your chosen video platform
- In your activity, switch the text editor field to Text view
- Inserts your cursor where you would like to embed the video and paste the code